
I’ve been inexcusably slow to finish this write-up, as the task of putting this experience to paper has been daunting. Our Claymore build was the most complex costume I’ve ever had the pleasure of working on. It was also the most rewarding. Hang in there; you’re in for one long blog.
Stage 1: Assembling the Team
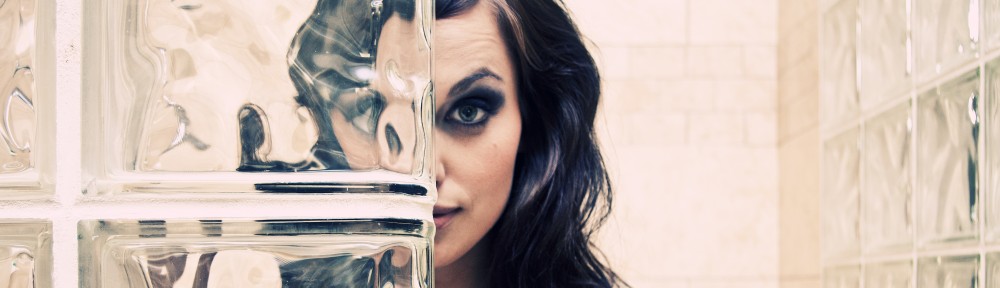
So how did this beautiful relationship begin? I’d met Linda Le, also known as VampyBitMe, just prior to my big move across the country last
year. I really enjoyed the limited time I spent with her, and when I learned I’d be
living less than 20 minutes away, a collaborative costume was a no-brainer. It became
even more ideal when we were both invited to be cosplay guests at the same convention –
Katsucon – in February of 2012.
We just had to narrow down the theme.
About the same time my boyfriend had started and finished a Claymore marathon in a single sitting. The ambient music and dialogue from the other room had me instantly intrigued. I sat down the next weekend and did the same, falling in love with the characters, costume design, and overall narrative of Claymore. In a moment of serendipity the next day, Linda posted a progress photo of her own Claymore costume to Facebook – the first stages of wig and bodysuit for Teresa of the Faint Smile. The madness began soon after.

We both wanted the cosplay to be one of the most impressive of our portfolios, so some large amount of time was spent ideating techniques for the swords and armor – Linda is an expert seamstress, so we didn’t sweat that aspect at first. I work primarily in Wonderflex and craft foam, but knew they wouldn’t cut it this time around.
Part of the discovery phase involved chatting up a friend from work – Michael Poon – who offered some great advice and put us in contact with a friend who runs a fabrication shop up in Sacramento. We met the owners (Zack and his wife Kris) a week or so later and immediately hit it off over debates about Star Wars, Gundams, and gaming. With that, our team began to assemble.
The best part of collaborating with a big group is the unique skills we each brought to the table. Michael, Zack, and Kris specialize in engineering and machining, while Linda and I offered up the more creative and aesthetic angle. In total, Linda and I made the drive up to Sacramento for five long weekends during the build, taking advantage of the massive shop and picking the brains of our newfound friends. Specifics on each aspect of the project below!

The Sword: Claymores
To be totally honest, Zack got a bit excited about the project, and had our
first sword nearly complete by the time Linda and I arrived up in Sacramento the kickoff
weekend. Thanks Zack! After freaking out about how amazing the blank blade looked, we
sat down and chatted about how to polish it off and replicating a second.
Despite the first blade being nearly done, Zack made sure to run us through the process so we could wrap our heads around the fabrication. After plotting out the sword in SolidWorks, a CNC (computer numerical controlled) machine milled the blade out of solid aluminum. We considered at one point welding sheet metal together to hollow out the blade and make it lighter, but the milled approach resulted in a much higher quality and was worth the extra few pounds.
In regards to the hilt of the sword, the pommel and cross-guard pieces were also mapped out in SolidWorks by Zack, and then lathed/milled, respectively. The grip is spun carbon fiber fixed with colored epoxy – red for my blade and blue for Linda. Zack was even able to cut our respective symbols from the swords – another perk of the blade being solid. The pommel and guard were then painted with high-quality gold automotive paint.
My sword was the first out of the metaphorical oven, and after comparing it to our statures we scaled Linda’s down to be a bit more proportional. To acknowledge the obvious – yes, the blade is taller than in the show or manga. Without realizing the discrepancy, we scaled the Claymore off the PVC MegaHouse figure of Clare, which showcases the sword at a much larger size. After investing so much work into them we weren’t going to start over. Also, there is no such thing as making a sword too big.
At that point, the swords were mostly done, except for a large amount of sanding required, and dulling down the edges for convention safety. They were sharp enough to murder watermelons for this video, and to be honest; they didn’t dull down a noticeable amount. I’m surprised they weren’t confiscated at Katsucon! The swords easily weigh over fifteen pounds, but were worth the exhaustion from carting them around.
Claymore WIP – Sword

Armor: Pauldrons & Sword Sheath
The shoulder pauldrons were by far the most challenging part of the build, and
a big learning experience for everyone involved. The most difficult aspect wasn’t the
fabrication, but rather engineering how everything would stay in place and where to
position the points of attachment, as well as scaling them for two vastly different
stature individuals.
We looked at using traditional mould setups and plastic composites, but ended up using carbon fiber as the most lightweight and durable option available. Yes, I’m fully aware that we were spoiled on this project.
To start the pauldrons we again took advantage of the CNC machine. Zack had the moulds drawn up and milled by the time we arrived the next weekend, leaving the actual fabrication to Linda and I once we settled in. After demoing the technique to us, Linda and I laid out sheets of carbon fiber, cut them into thin strips, and wove them back and forth in the concave aluminum shapes. After five or so layers, we covered the entire form in heat-resistant cloth, created plastic vacuum seal bags, and sucked out all the air to compress the carbon fiber. Each shoulder piece has two tiers, so in total we repeated the process eight times, consuming the majority of a single weekend even with the help of the rest of the team.
After baking the pauldrons in an industrial oven, the carbon fiber shapes were set, albeit very rough. Then came repeated fittings and shaping, which again took the better part of a day. Linda and I struggled with the exact size and shape to cut them to (we baked them considerably larger then needed so we could custom fit them to our shoulders) as each reference image looked different. We printed hundreds of stills from the anime, and constantly consulted the manga, but it came in little aid. Eventually we settled on a shape somewhere between the perfect oval and dramatic point the armor seemed to swap between.

Early designs done in SolidWorks
Marking out our final patterns in a silver sharpie, we cut away the excess materials and started the process of sealing the forms with Bondo and sanding. And sanding again. And again. And again. We then used a piece of foam to bolster the tiers of pauldrons on each shoulder and give them the accurate angle and degree of separation.
What we referred to as the “backpack” was created in a very similar way – aluminum mould, woven carbon fiber, baking, Bondo, and sanding. In the anime the form is used to sheath the giant Claymores, but we quickly learned that our arms could not feasibly extend far enough to actually draw a sword from that angle, so form took priority over function.
Returning for another weekend, assembly became the biggest focus for us, and it took dozens of attempts to get it right. A full day of fittings unfolded as we learned that animators don’t necessarily consider real-life engineering issues when creating entertainment. We could find no points of attachment on the armor, aside from the more intricate metal designs along the breastbone (these shapes were drafted in SolidWorks and cut with the water jet).
At some point we gave up trying to hide hardware and permanently attached the pauldrons to the backpack and front pieces with locking nuts and bolts. Even at this stage we were adjusting the armor constantly to form it properly to our chest and shoulders. The final result was a bit back heavy, but we were able to mitigate that at a later stage.
Claymore WIP – Pauldrons
Armor: The “Petals
Weird nicknames aside, these pieces shouldn’t have been overly complicated but again
ended up being a nightmare. Early on we came to the agreement that using a urethane
blend would be the best approach for them. Finding that perfect blend was extremely
difficult, however. Zack and Kris tried dozens of mixtures to ensure it wasn’t too heavy
or brittle, and malleable enough to conform to our bodies. Michael proposed a perfect
solution in embedding wire mesh to provide extra staying power for shaping. We put the
wire mesh into our CNC milled moulds and spent another weekend mixing, pouring, and
drying the urethane pieces once Zack found the appropriate ratio of parts. Each took two
hours to dry, and both Linda and I needed nine pieces, so the process ate up most of
another weekend. The petals cured well, but required some Bondo here and there to fill
pockmarks from escaping air. Much more sanding followed.
With the petals finished, Linda and I shifted our attention to the harness, to ensure they would sit correctly before we shaped them to our hips and thighs. After much thought, we decided for a fairly rudimentary approach by attaching each petal to an elastic band that sat at our natural waist. Sewing them into the tunic itself wouldn’t have been seamless enough, but the curve of our waists would help to disguise the thickness of the petals. We drilled holes in each petal top and hand sewed them into the interior of the band, using a bit of felt to protect our skin from the urethane. The exact positioning and attachment methods again took some trial and error, but after a day or so we had them mostly finished.
Then came the baking. We put the entire skirt piece in the oven for two or so minutes, and shaped each petal one at a time so they lay flush with our lower half. After cooling, we took every thing – petals, pauldrons, and other assorted shapes, to the shop for painting. Again, we used high-quality automotive paint to ensure it was thick and chip resistant.
Claymore WIP – Skirt
Bodysuits, Capes, and Cowls
While away from Sacramento, Linda nabbed some not-so-cheap triple ply fabric from
downtown San Francisco, which worked perfectly for the Claymore bodysuits. I was nervous
about donning a white body suit in public, but the fabric was thick enough that there
was no transparency to it.
Linda whipped out both bodysuits in a weekend, and then we met up for fittings and alterations. Eyeballing the deep neckline and concave tunic shape, we cut and finished all the edges by hand in our moments of downtime in Sacramento. The capes were cut from the remaining fabric in a single piece, giving careful consideration to the shape so that they would drape and move appropriately.
Our final weekend in Sacramento was the most stressful, as we planned a photoshoot for that Sunday. Linda and I were up working on the cowl pieces for hours just prior to the shoot. As all cosplayers know, good intentions and careful planning only help so much when it comes to finishing costumes early. Somehow it always comes down to the last minute and a lot of industrial strength velcro.
The Final Touches
The final touches resulted constant scrambling the week before the shoot, as we had to
purchase white cloves, silver contacts, and add various snaps and Velcro bits all over
the costume to ensure everything stayed in place. Linda also had to cut and style the
wigs. Last minute, we even decided to whip together a young Clare costume for Zack and
Kris’ daughter, who was a super trooper for participating and looked totally adorable.
Our initial photoshoot with James Ellerker proved to be a much-needed test run for the
costumes, although the images turned out quite well despite the stress. After the shoot,
I removed one of the arms from my tunic and whipped up a Quicksword arm, assembling it
from some faux leather and some belts I nabbed at Target.
Finishing Touches Gallery
Claymore – Finishing Touches
Katsucon
After all the pressure of coming down to the wire subsided, Katsucon was a blast and the
costumes were received incredibly well. I owe the convention administrators a huge thank
you for being such fantastic hosts, and throwing a wonderful show. The highlight of the
convention was our shoot with my good friend Ljinto, who does the majority of my cosplay
photography. He scouted the perfect location just outside our hotel, boasting an amazing
statue called “The Awakening.” Linda and I transformed it into a giant Yoma emerging
from the sand, waiting to be slain by a pair of vengeful Claymore. The day was overcast
and gloomy, setting a somber tone for the shoot. It was perfect.
Claymore Portfolio
Final Thoughts
I usually make costumes alone in my apartment in the midst of a movie marathon. Having
never collaborated with a group before, this build was an incredible experience, and
inherently much more fun than sitting by myself making a mess on my floor. In fact, we
all got along so well that a builders group was born from our cosplay collaboration – Mantium
Industries. You can read more about our group and goals here.
Essentially, we just want to make cool shit.
With all the unique skills we each brought to the table, everyone involved walked away having learned something new. Despite all the false starts and occasional frustrations, we can’t wait to collaborate again.
Phew! That was a mouthful! Want to get even geekier about the build? Read our interview in Composites World Magazine for even more tech specs!
Mantium Team Credits: Zack & Kristine Spencer, Michael Poon, Linda Le, Meagan Marie, Scott Trauthen, Robert Maurer, and growing!


Wow, I figured the cosplay process was a complex one but never this deep. Regardless you pull it off amazingly and awesome!
Thank you David! It was an unusually intense build, but such a great learning experience. I want to start teaching myself SolidWorks when I have the time. Hopefully some of my design experience will translate!
Wow!!! This is amazing. Details, details and details. Thank you for sharing in the process you go through. Wow!!!
Awesome work ! love this
Thank you Gabriel!
Claymore is really a wonderful anime with intense and powerful images. It is amazing to see and understand how you succeed to recreate such visuals in a realistic fashion. I never thought cosplay could be so good! And you’re both beautiful in Claire and Theresa’s costume!
Thank you so much Gawain!
Love the cosplay along with the anime Claymore, easily one of my favorites. Amazing as always Meagan…
OMG I work in a machine shop and when I saw the CNC MILL and LATHE I instantly knew what they were and my jaw hit the floor! I would have never believed that a shop would do that, I’d be making so many accessories and cosplay items here, but we only do parts for oil companies :-P. Anyway love the cosplay and everything you do, my wife and I are saving to go to SDCC someday thanks to your WIP reports I have something to go off of for costume design and fabrication since we are relatively green on the subject of cosplay. Keep doing what you doing girl and hope to see you at convention someday! Peace.
So cool to hear Gabriel! Good luck on your own costumes! 😀